Connecting to a VCS
To add projects (Git repositories) to the system for analysis, you must first create a connection to the version control system (VCS). CodeScoring supports the following platforms:
- GitLab
- GitHub
- BitBucket (Data Center and Server only)
- Azure DevOps Git
- Gitflic
- Other platforms using Git
Integration occurs through two possible mechanisms: Personal Access Token or SSH key. For the Personal Access Token mechanism, it is possible to connect several version control systems with the same address, but different tokens.
After connecting the version control system, it is impossible to change its type (Instance type) and address (Instance URL).
Note: if private NS servers are used to access the version control system, they must be specified in the platform settings. To obtain the appropriate templates, you must contact the vendor.
Adding an SSH key
- Copy an existing or generate a new private SSH key in the version control system according to the instructions for:
- Gitlab
- Github
- BitBucket
- Azure DevOps Git
- In the CodeScoring interface, go to the
Settings -> SSH Keyssection - Click Setup new in the upper right corner.
- Fill out the form. The private SSH key is inserted into the Instance private key field.
- Go to the
Settings -> VCSsection. - Click Setup new in the upper right corner.
- Fill out the form as shown in the screenshot. The SSH key is selected from the list in the SSH key field.
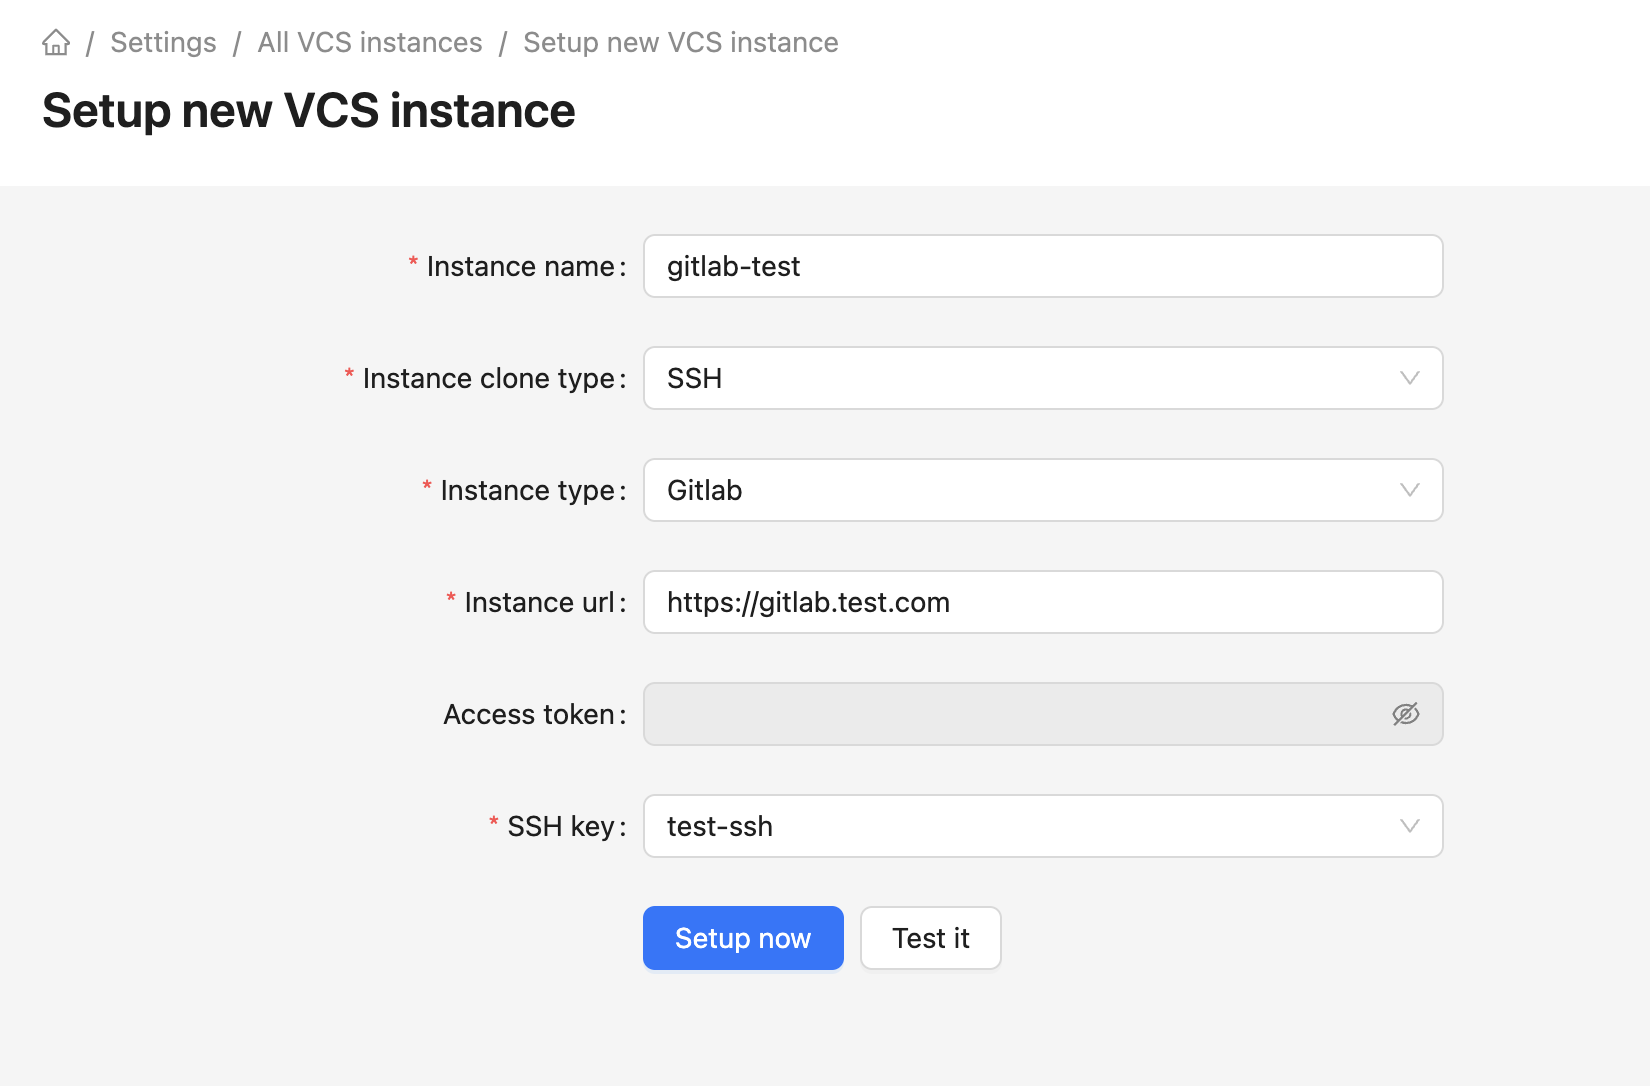
- You can check the connection by clicking the Test it button. To create a connection, click on the Setup now button.
Adding a token for GitLab
Original instructions for generating a token: https://docs.gitlab.com/ee/user/profile/personal_access_tokens.html#create-a-personal-access-token
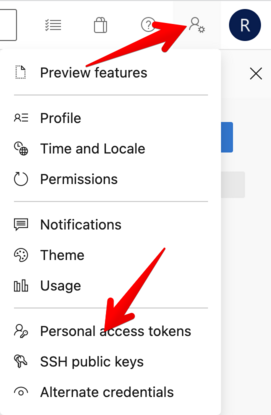
- Log in to your GitLab account.
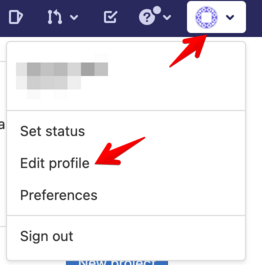
- Through the user menu in the upper right corner, go to the Edit profile section.
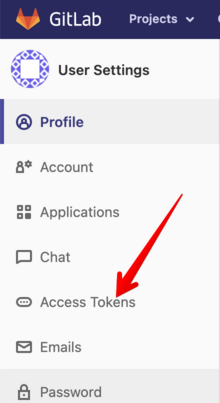
- Next, in the left menu, select the Access Tokens section.
- Give the token a name, for example, “codescoring-demo”, the date can be left blank
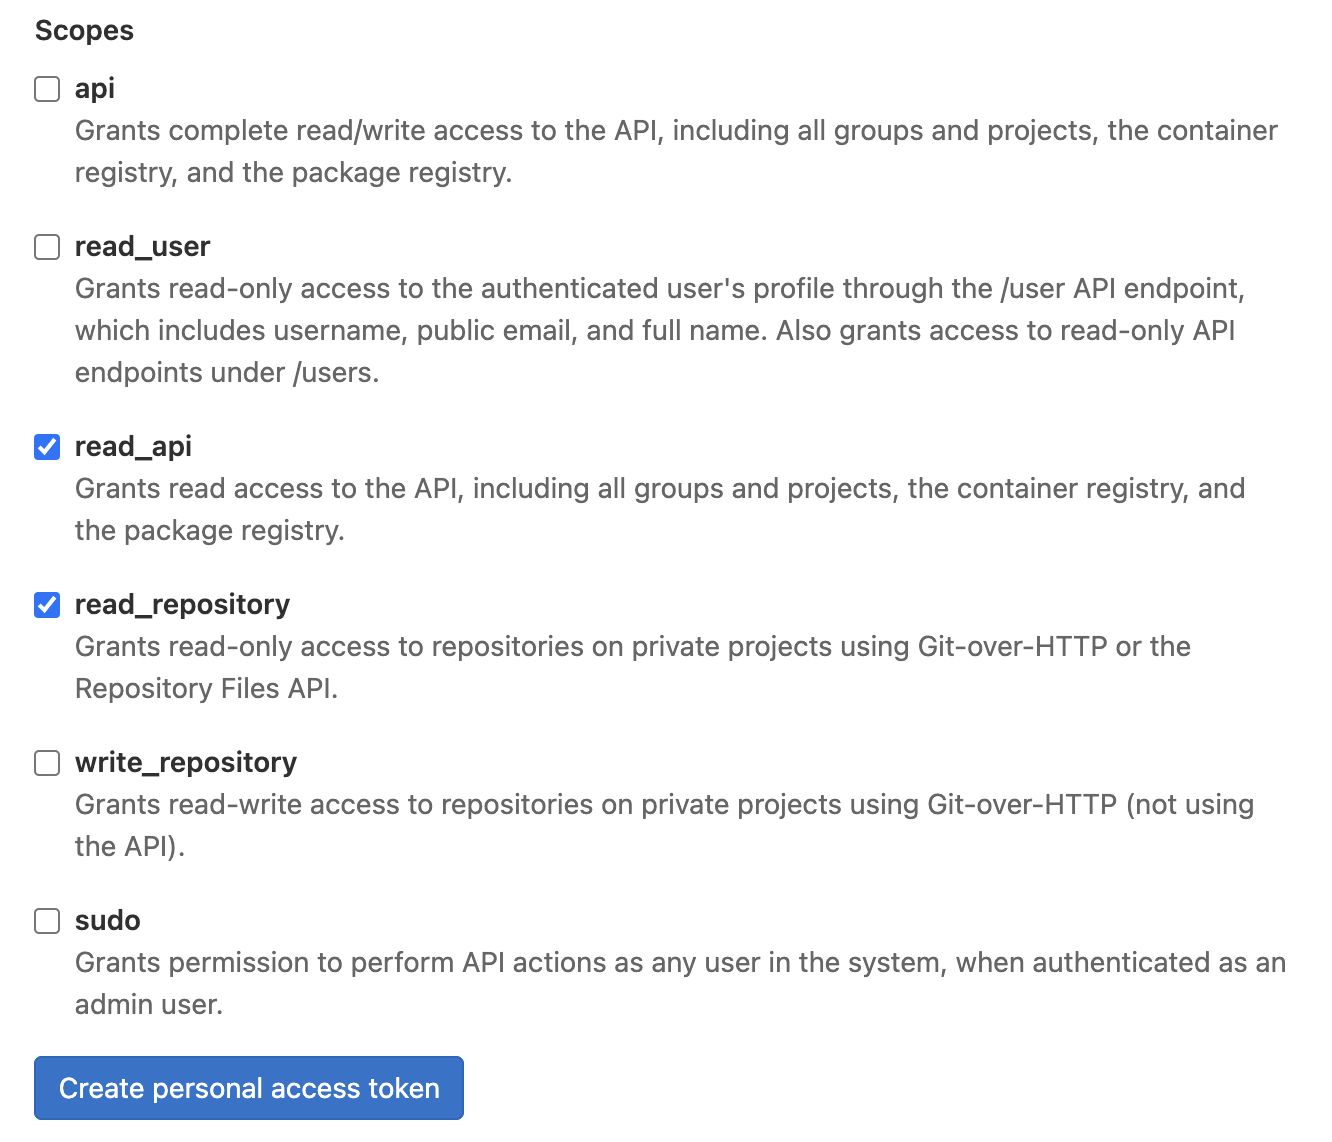
- In the scopes section, select read_api and read_repository.
- Click the Create personal access token button.
- Copy the generated token.
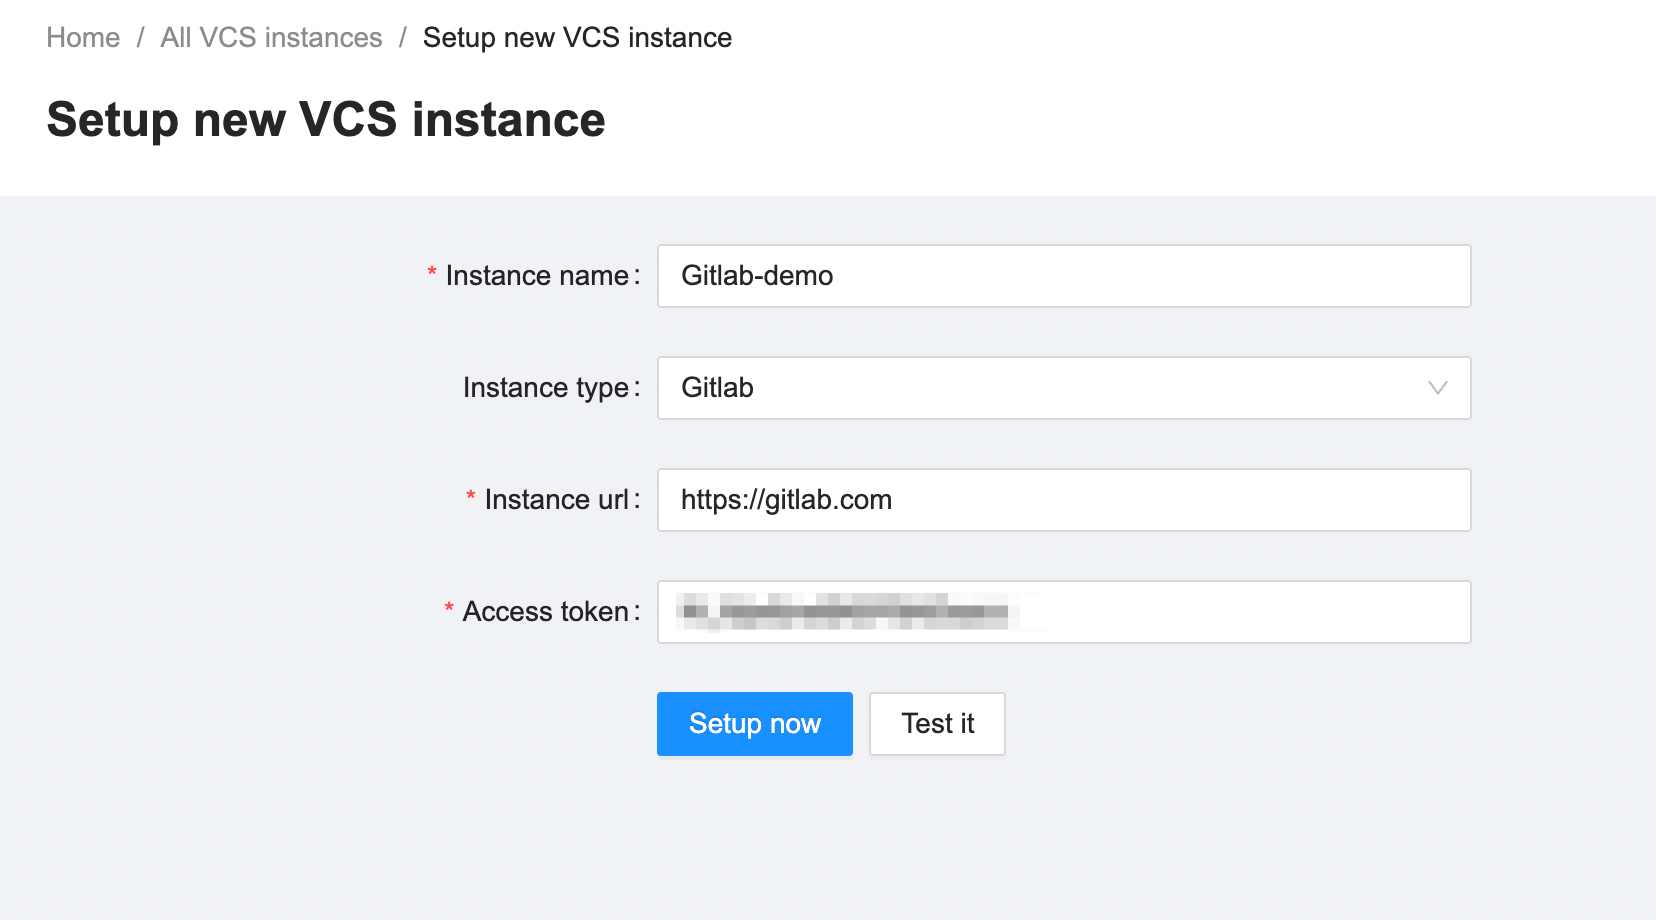
- In the CodeScoring interface, go to the
Settings -> VCSsection. - Click Setup new in the upper right corner.
- Fill out the form as shown in the screenshot. The token is inserted into the Access token field.
Adding a token for GitHub
Original instructions for generating a token: https://docs.github.com/en/github/authenticating-to-github/keeping-your-account-and-data-secure/creating-a-personal-access-token
- Log in to your GitHub account; for the cloud version, the login is available at https://github.com/login.
- If your account email is not verified, be sure to do this according to instructions.
- Through the user menu in the upper right corner, go to the Settings section.
- Next, in the left menu, select the Developer settings section.
- In the left menu, select the Personal access tokens section.
- Give the token a name, for example, “codescoring-demo”.
- In the Select scopes section, select all options from the repos list.
- Click the Generate token button.
- Copy the generated token.
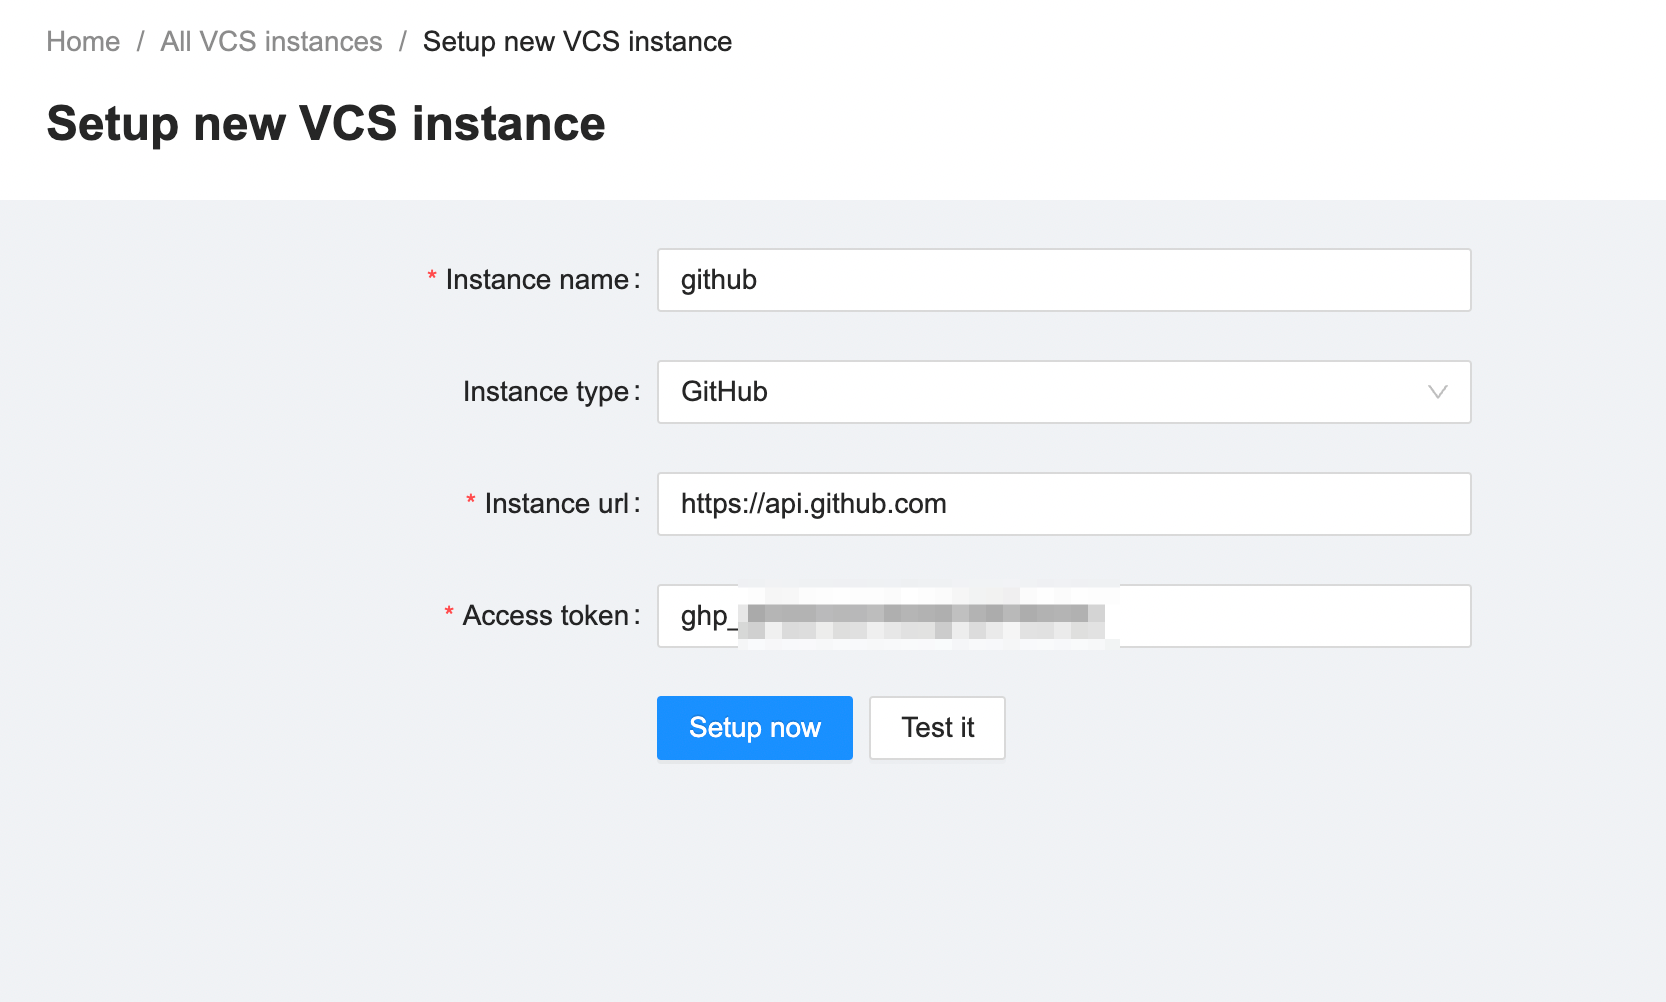
- In the CodeScoring interface, go to the
Settings -> VCSsection. - Click Setup new in the upper right corner.
- Fill out the form as shown in the screenshot. The token is inserted into the Access token field.
Adding a token for BitBucket Data Center and Server
Original instructions for generating a token in English: https://confluence.atlassian.com/bitbucketserver072/personal-access-tokens-1005335924.html
- Log in to your BitBucket account.
- Through the user menu in the upper right corner, go to the Manage account section.
- Next, in the left menu, select the Personal access tokens section.
- Click on Create token.
- Give the token a name, for example, “codescoring-demo”.
- In the Permissions section, give read rights to projects and repositories.
- In the Expiry section, if desired, set the token lifetime.
- Click the Create button.
- Copy the generated token.
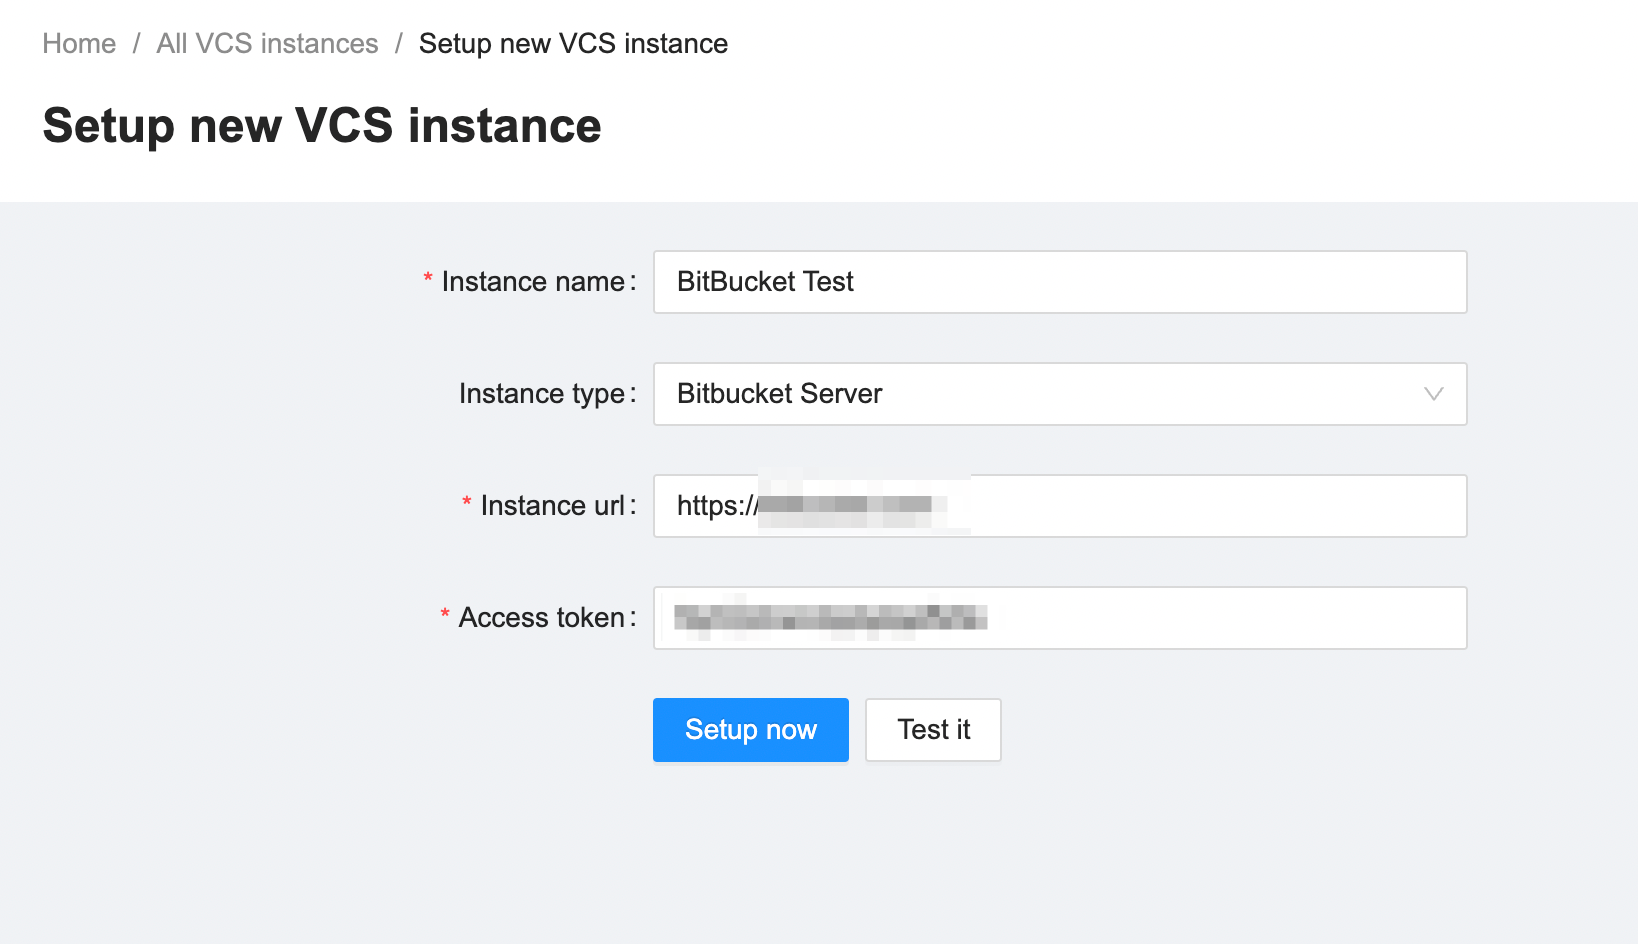
- In the CodeScoring interface, go to the
Settings -> VCSsection. - Click Setup new in the upper right corner.
- Fill out the form as shown in the screenshot. The token is inserted into the Access token field.
Adding a token for Azure DevOps Git
Original instructions for generating a token in English: https://docs.microsoft.com/en-us/azure/devops/organizations/accounts/use-personal-access-tokens-to-authenticate?view=azure-devops
- Sign in to your Azure DevOps account.
- Through the user menu in the upper right corner, go to the Personal access tokens section.
- Next, click the New token button.
- Set a name for the token, for example, “codescoring-demo”, and the validity period of the token.
- In the Scopes section, be sure to check Read access for the Code and Identity entities.
- Click the Create button.
- Copy the generated token.
- In the CodeScoring interface, go to the
Settings -> VCSsection. - Click Setup new in the upper right corner.
- Fill out the form as shown in the screenshot. The token is inserted into the Access token field.

Connecting GitFlic via ssh
-
Create a new ssh key pair without passphase with type RSA_SHA512,SSH_ED25519 or ECDSA-SHA2-nistp256.
-
Go to GitFlic web interface,
Settings -> Keysand add public key to GitFlic key pool.You can view the contents of the public key using the following command:
-
Go to the CodeScoring interface in the
Settings -> SSH Keyssection, open the form for adding a key by clicking the Setup New button and add the private key to the CodeScoring key pool.You can view the contents of the private key using the following command:
-
Go to the
Settings -> VCSsection, open the form for adding a VCS by clicking the Setup New button and fill in the fields for creating a VCS instance:- Instance name – VCS connection name;
- Instance clone type – cloning type (select SSH type);
- Instance type – VCS instance type (select Other git type);
- Instance url – the address where VCS is available;
- SSH key – the SSH key created in step 3.
-
Go to the
Settings -> Projectsection, open the form for creating a new project by clicking the Create New button and fill in the project creation fields:- Repository – a link to the repository in GitFlic;
- VCS – the name of the VCS instance created in step 6.
Important: due to the specifics of GitFlic and CodeScoring, the standard link to the repository must be modified by removing the
/project/part of the path. For example: -
Save the project.
Synchronization of data from VCS
CodeScoring automatically synchronizes data from version control systems when adding a project, running analysis, and as part of background tasks. All mechanisms for obtaining and updating data from git are described below:
- When adding a VCS-project, CodeScoring creates a local copy of the repository in
baremode and saves it in the project directory. - When running SCA, TQI or Secrets analysis, the system downloads the current state of the branch specified in the project settings.
- Once a month, CodeScoring initiates a background task that synchronizes all connected VCS projects with remote repositories. This is a preventive update that does not replace synchronization when running analysis, but only speeds it up for projects where the analysis has not been performed for a long time.
git fetchis performed for all VCS projects- Tasks are distributed using the Huey tool to evenly distribute the load over the remaining days of the month
Note: if you need to synchronize the repository early, you can use a manual code update on the project page in the Settings -> Projects section.