Integration into Jenkins Pipeline
The CLI agent supports integration into Jenkins in two ways: through Jenkinsfile and a specialized plugin.
Adding agent to Jenkinsfile
Using a Docker image
An example of adding agent to a pipeline using a Docker image:
pipeline {
 agent any

 environment {
 CODESCORING_REGISTRY_URL='registry-one.codescoring.ru'
 CODESCORING_AGENT_IMAGE='registry-one.codescoring.ru/johnny-depp:<version>'
 CODESCORING_REGISTRY_CREDENTIALS=credentials('cs-registry-creds')
 CODESCORING_API_URL='https://localhost:8080'
 }

 stages {

 stage("Login to Codescoring docker registry") {
 steps {
 sh """
 docker login -u "$CODESCORING_REGISTRY_CREDENTIALS_USR" "$CODESCORING_REGISTRY_URL" -p "$CODESCORING_REGISTRY_CREDENTIALS_PSW"
 """
 }
 }

 stage('Run CodeScoring Agent') {
 steps {
 sh """
 docker run -v \$(pwd):/code --rm ${CODESCORING_AGENT_IMAGE} --api_token ${CODESCORING_API_TOKEN} --api_url ${CODESCORING_API_URL} --ignore .tmp --ignore fixtures --ignore .git .
 """
 }
 }
 }
}
Using a binary file
To use the console agent binary file, you must first perform the following steps on the Jenkins machine:
- Download the file with the command
wget -O /usr/local/bin/johnny https://REGISTRY_USERNAME:REGISTRY_PASSWORD@registry-one.codescoring.ru/repository/files/codescoring/johnny-depp/JOHNNY_VERSION/johnny-linux-amd64-JOHNNY_VERSION
or
curl -o /usr/local/bin/johnny https://REGISTRY_USERNAME:REGISTRY_PASSWORD@registry-one.codescoring.ru/repository/files/codescoring/johnny-depp/JOHNNY_VERSION/johnny-linux-amd64-JOHNNY_VERSION
The JOHNNY_VERSION variable must be replaced with the agent version. A list of current versions is available in the Changelog section.
The REGISTRY_USERNAME and REGISTRY_PASSWORD variables must be replaced with the login and password received from the vendor.
- Allow file execution
An example of executing the binary file in pipeline:
pipeline {
 agent any

 environment {
 CODESCORING_API_URL='http://localhost:8001'
 CODESCORING_API_TOKEN='API_TOKEN'
 }

 stages {

 stage('Run CodeScoring Agent') {
 steps {
 sh """
 johnny scan dir --api_token ${CODESCORING_API_TOKEN} --api_url ${CODESCORING_API_URL} --ignore .tmp --ignore fixtures --ignore .git .
 """
 }
 }
 }
}
Setting up Jenkins Plugin
The console agent plugin is supplied by the vendor as a separate file. To activate it you need to follow these steps in Jenkins:
- Go to the section
Configure Jenkins -> Plugins -> Advanced settingsand add the file received from the vendor.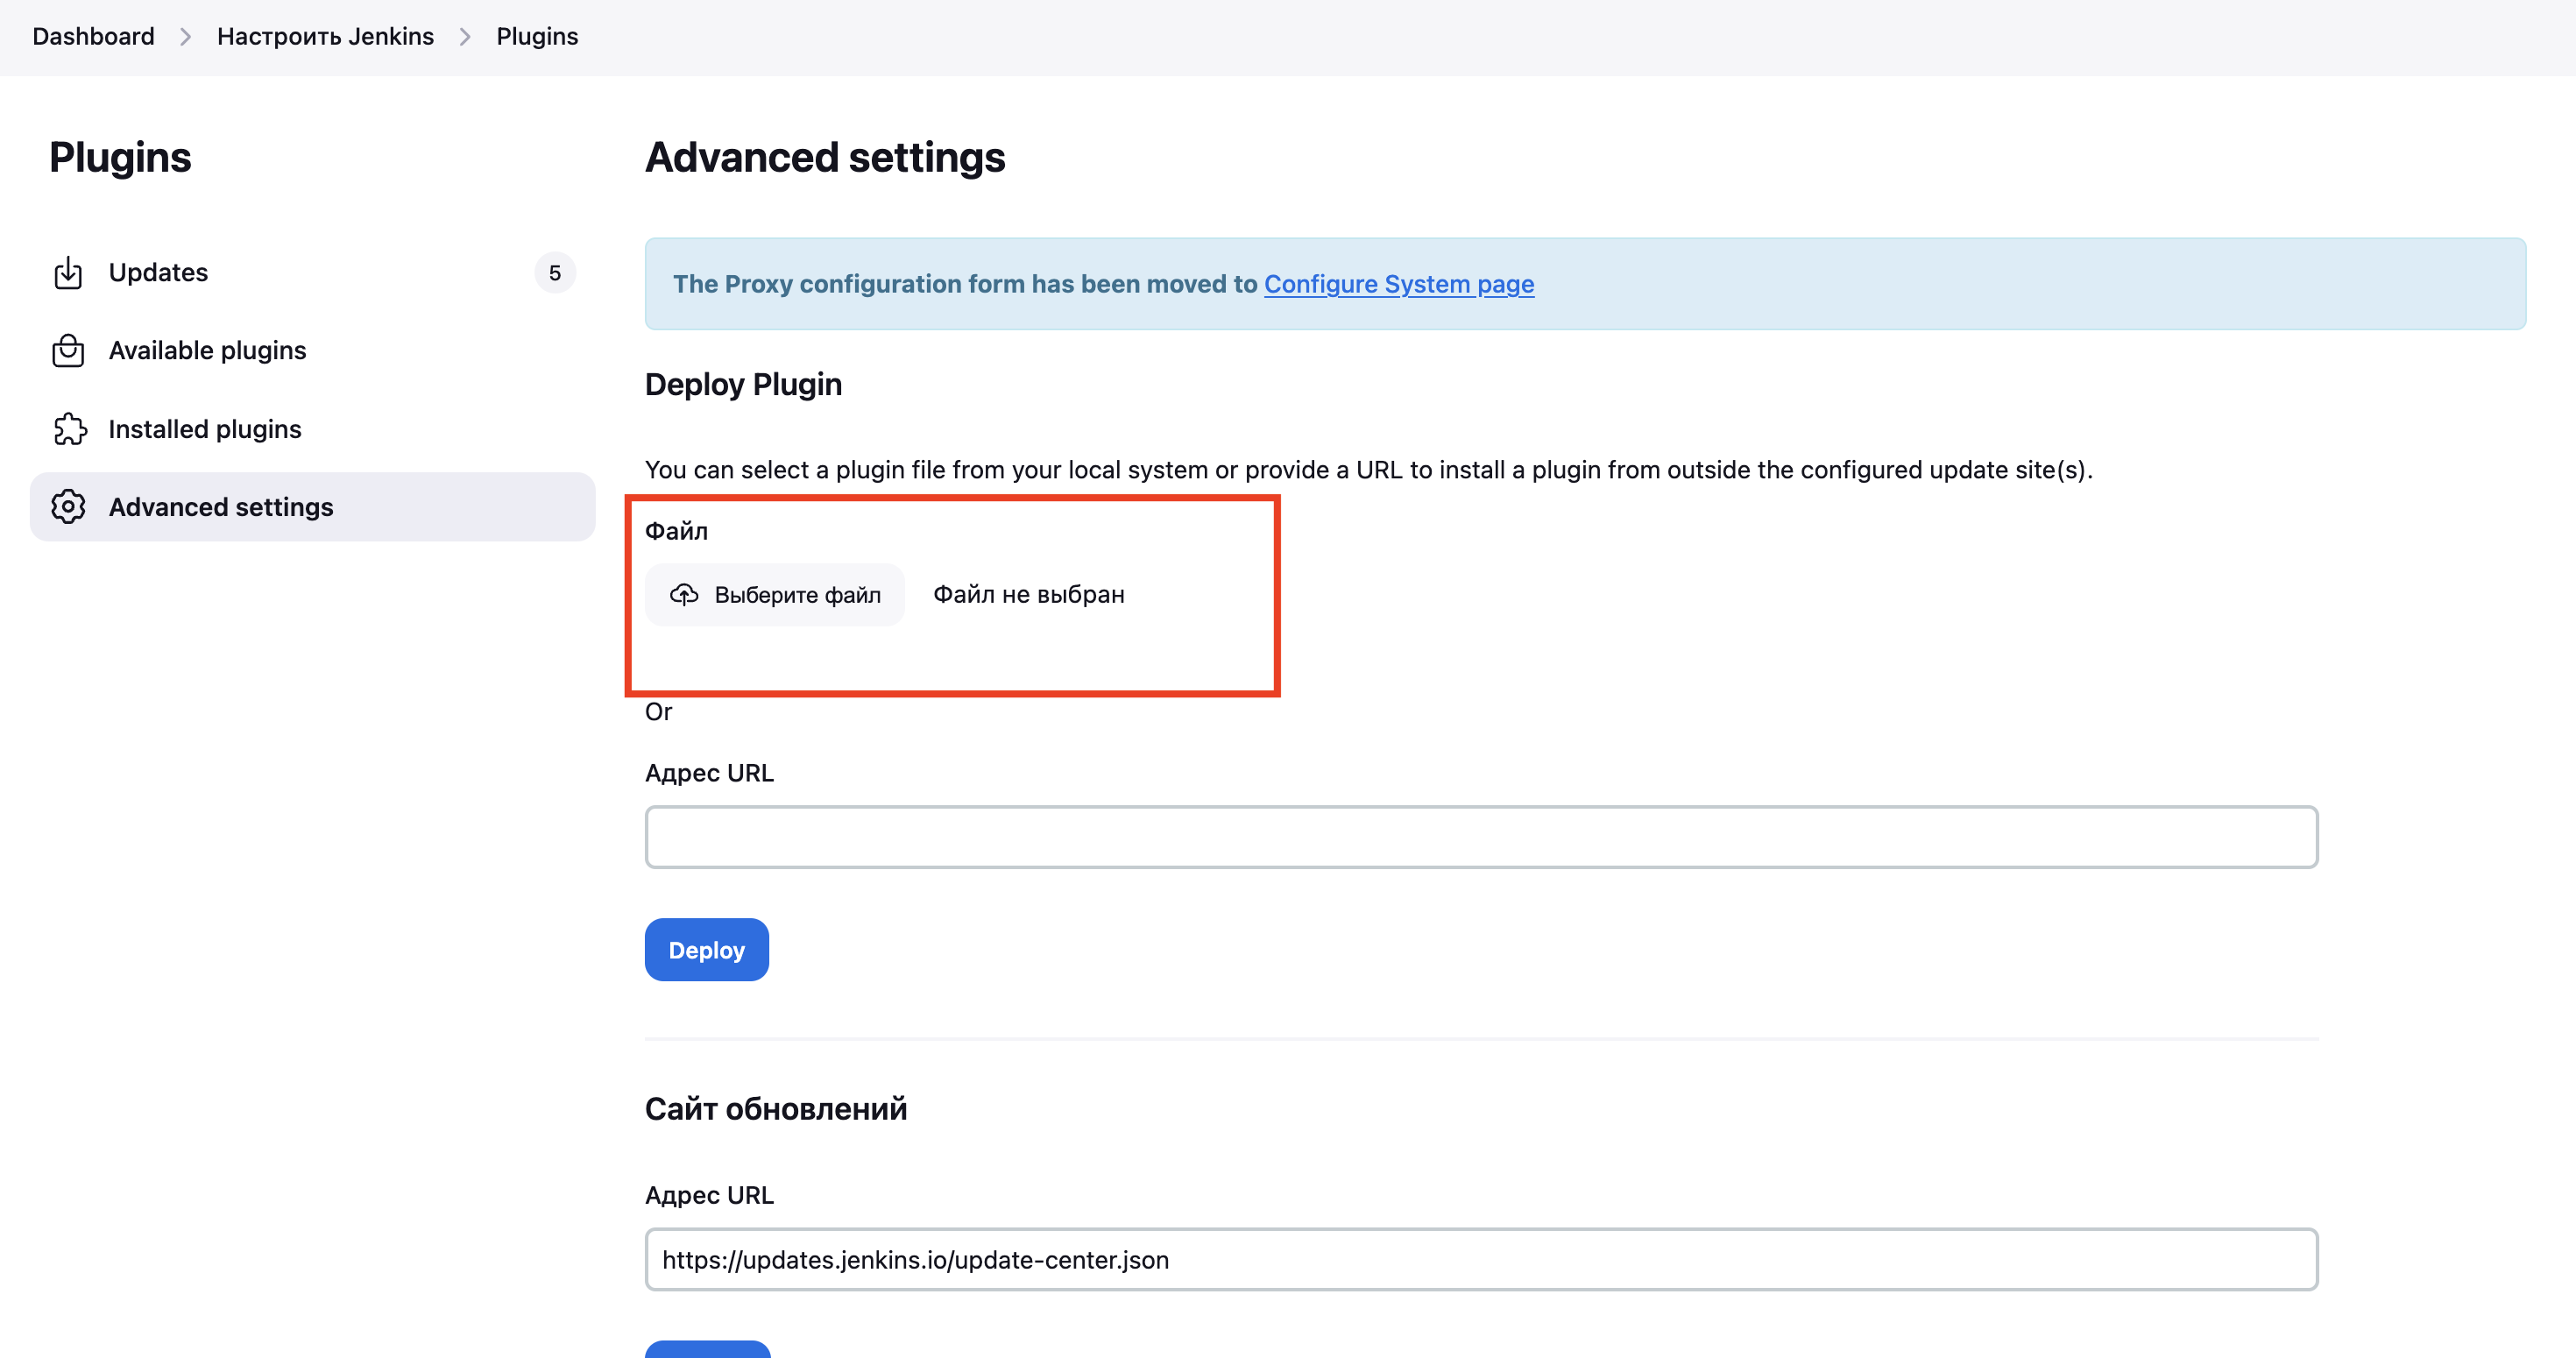
- Restart Jenkins
- Check the active state of the plugin in the
Installed pluginslist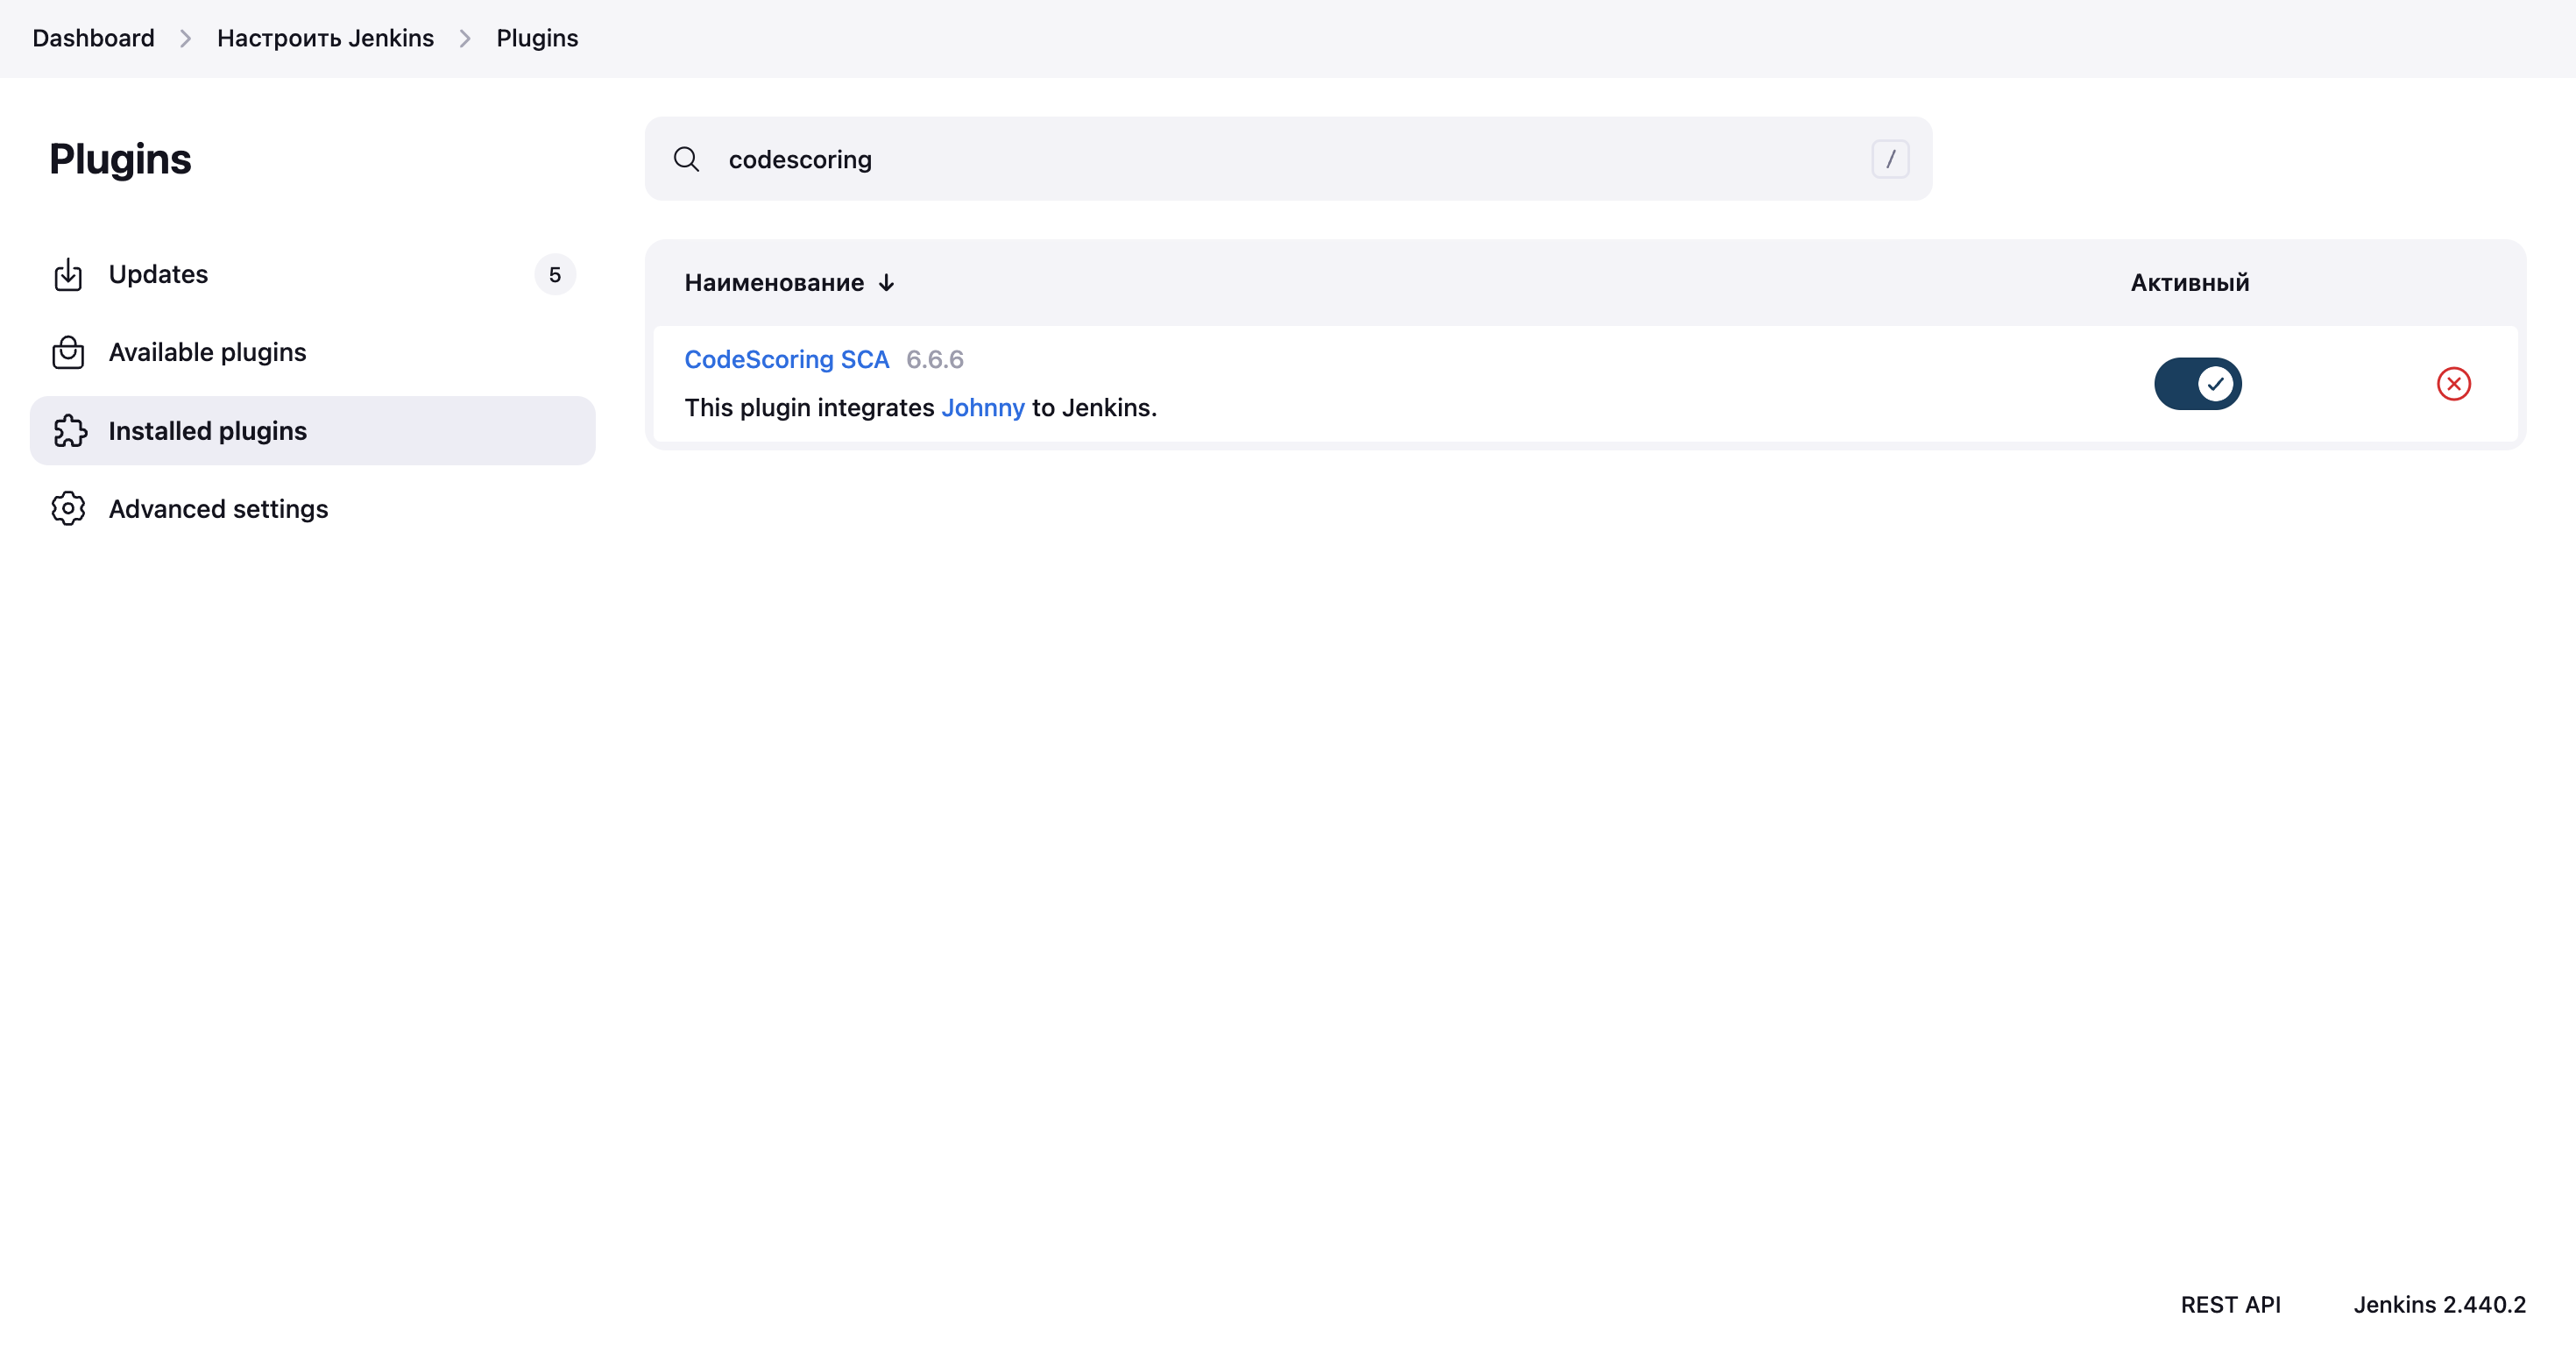
- Go to the section
Configure Jenkins -> Tools -> Johnny Installationsand specify the name of the installation and the location of the binary file with the console agent.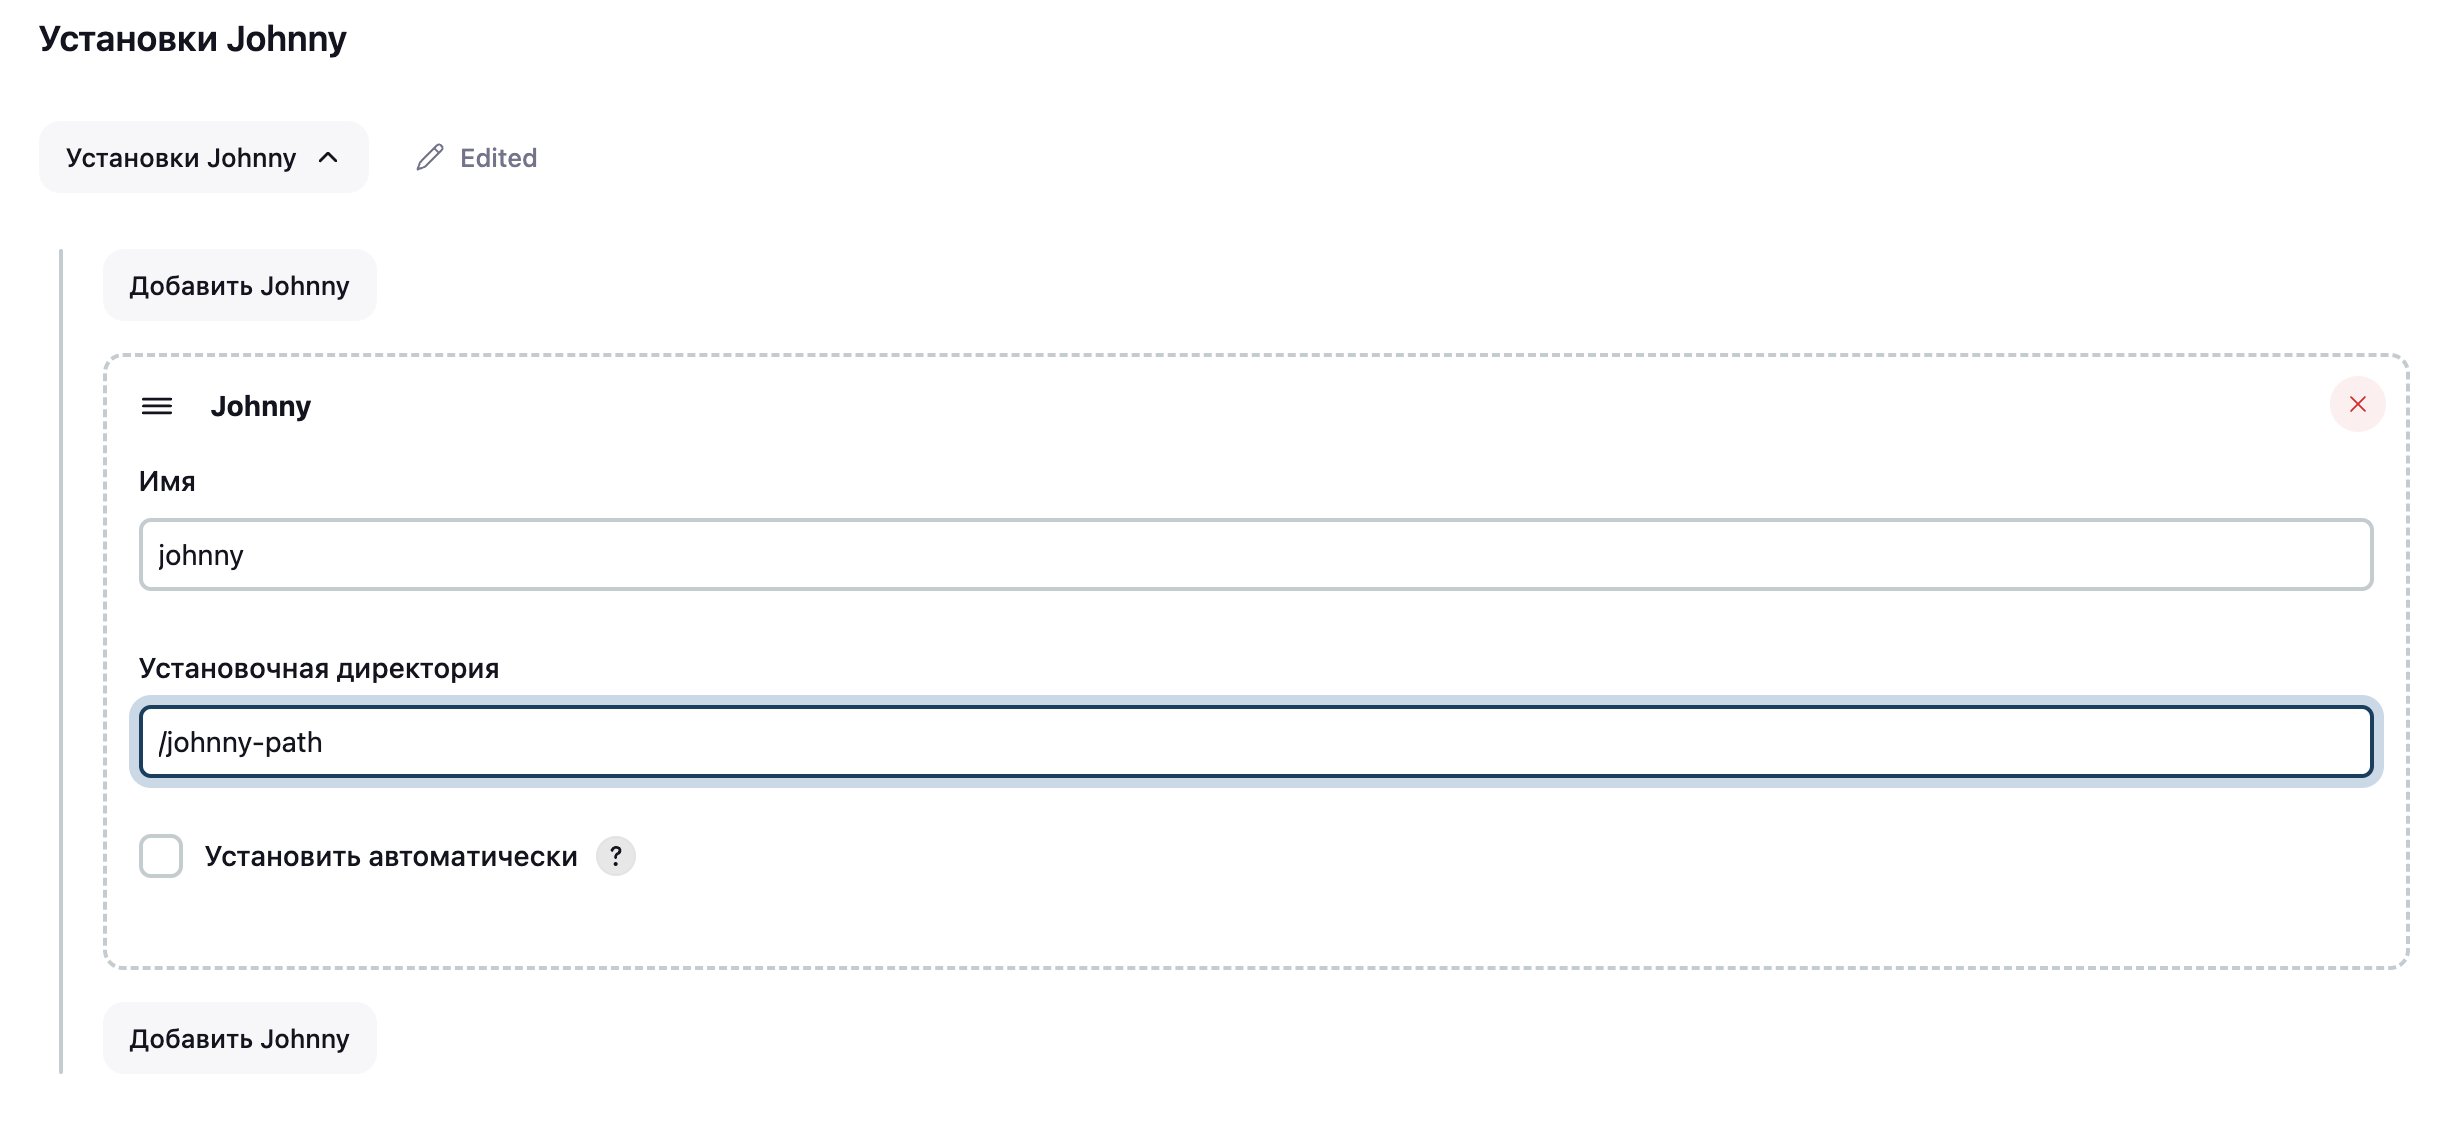
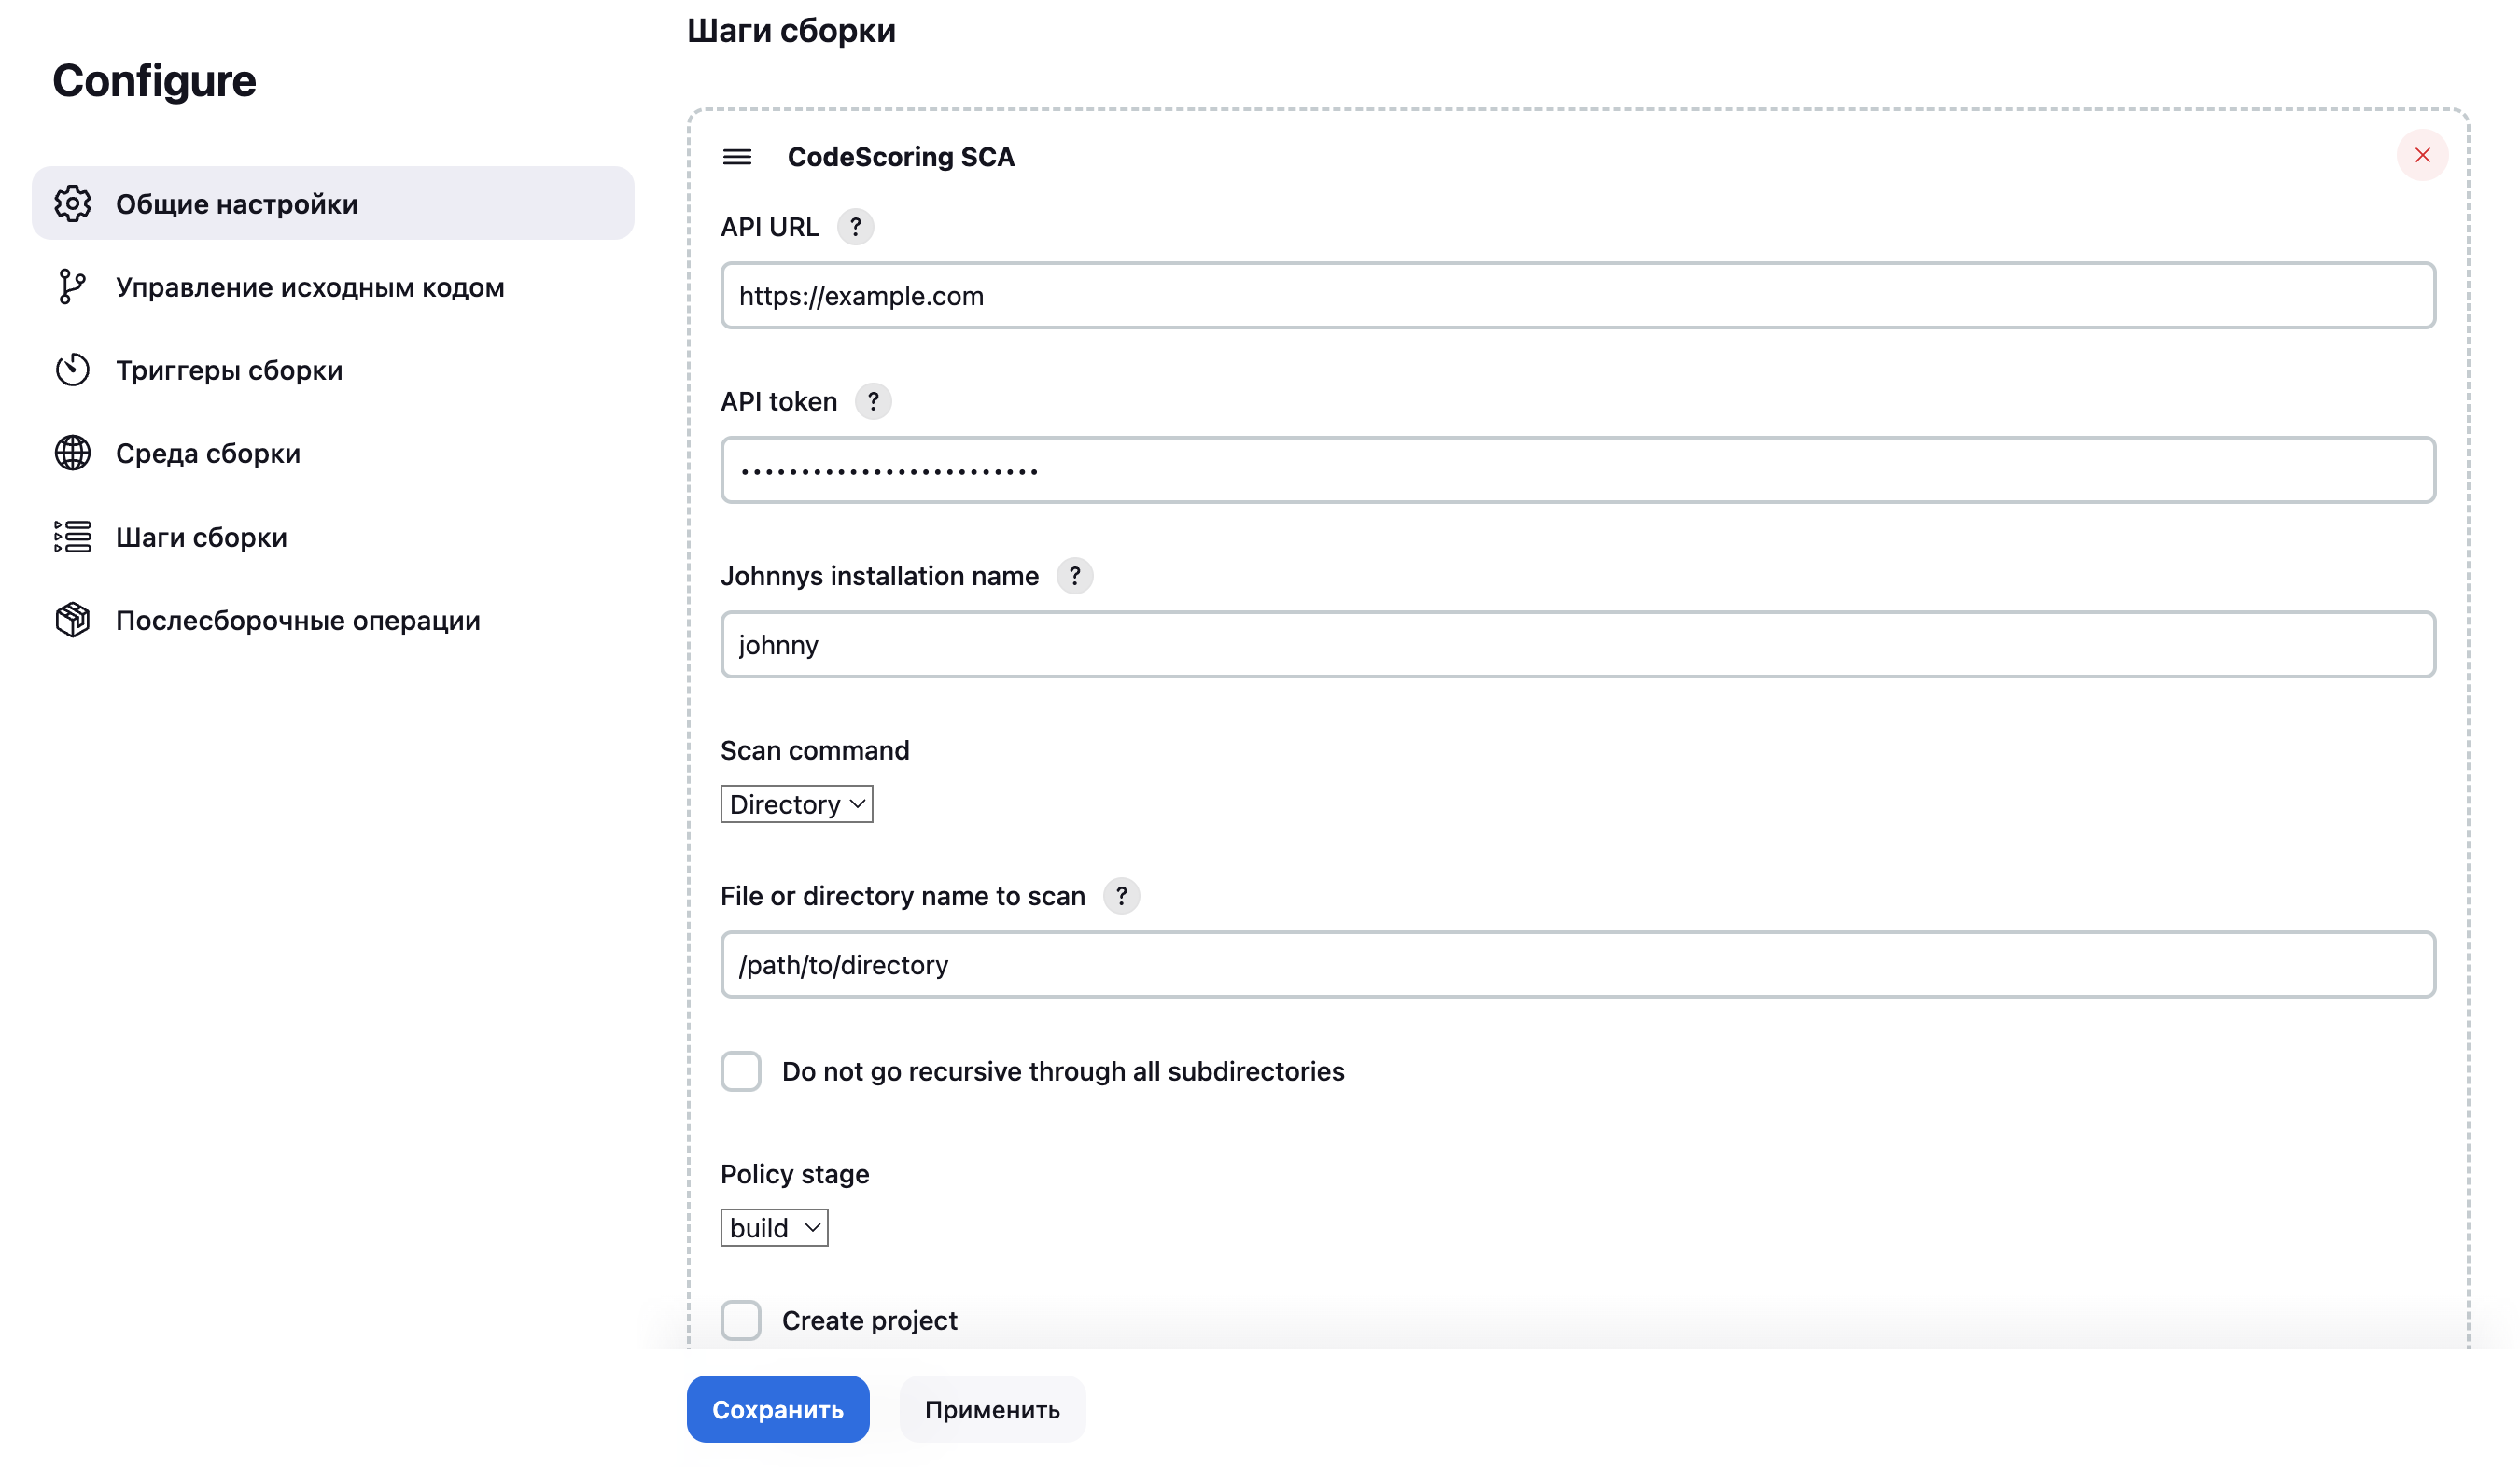
-
Go to the settings of the desired assembly and add the CodeScoring SCA assembly step, setting the following parameters:
- API URL – link to the CodeScoring installation (with protocol);
- API token – token for authorization;
- Johnnys installation name – name of the Johhny installation (as it is specified in the Tools section);
- Scan command – select a command to scan an entire directory, a single file or a container image;
- File or directory name to scan – name of the path or directory for analysis. Important: the full path is not indicated, only the required directory. For example: source-code-from-git;
- Do not go recursive through all subdirectories – disable recursive scanning for the directory scanning command;
- Policy stage – development stage for which the security policy applies. Possible values:
build,dev,source,stage,test,prod,proxy; - Create project – creating a CLI project on the CodeScoring installation with scanning results;
- Export to file – export to a CSV file to save scan results;
- Ignore paths – directories that will be ignored during scanning;
- failBuild – blocking the build if it does not comply with security policies;
- Timeout – limit on analysis waiting time (in seconds);
- Output detailed log – output of a detailed log of the command call.