Managing policies
General description
Policies on the CodeScoring platform are a mechanism for tracking and blocking open source components during software development. They can be related to security checks, license compatibility, or other criteria for including third-party components in development.
Policies can be created for:
- the entire organization;
- department;
- project;
- development environment;
- repository;
- component type.
The policy mechanism takes into account the specified stage of software development: from the download of third-party components into the organization's perimeter to tracking builds and writing new code.
Policies are configured based on conditions combined by logical expressions AND/OR. In addition to the standard security policy settings based on vulnerability severity level, conditions can be configured based on component metadata: release date, license, author, and others. A total of 40+ categorized conditions are supported. The checks also include a built-in policy for checking for license compatibility.
When a policy is triggered, corresponding alerts are created in CodeScoring. Alerts can be temporarily or permanently ignored, or they can be downloaded as a report.
Policies can be blocking: when such a policy is triggered, the components used are blocked in the artifact storage (proxy repositories), or the CI build is stopped until the detected defect is fixed.
Additionally, when a policy is triggered, a notification can be sent to the responsible specialists in the task management system or an email describing the problem.
Policy stages
Policy stages are configured by the user when editing project parameters in the Settings → Projects section in the Policy stage field or specified via the --stage parameter when running the console agent Johnny. The stages have the following meanings:
dev– development stage;stage– intermediate (pre-production) stage;test– testing stage;prod– production circuit.
When creating or editing a policy in the Settings → Policies section, you must specify the stages to which it will be applied.
In addition, there are special stage values used by default for certain tasks:
proxy– for the plugin in the OSA module;source– for VCS project analysis;build– for the Johnny console agent.
Creating a policy
Policies are created in the Settings -> Policies section. You can go to the policy creation form by clicking the Create button.
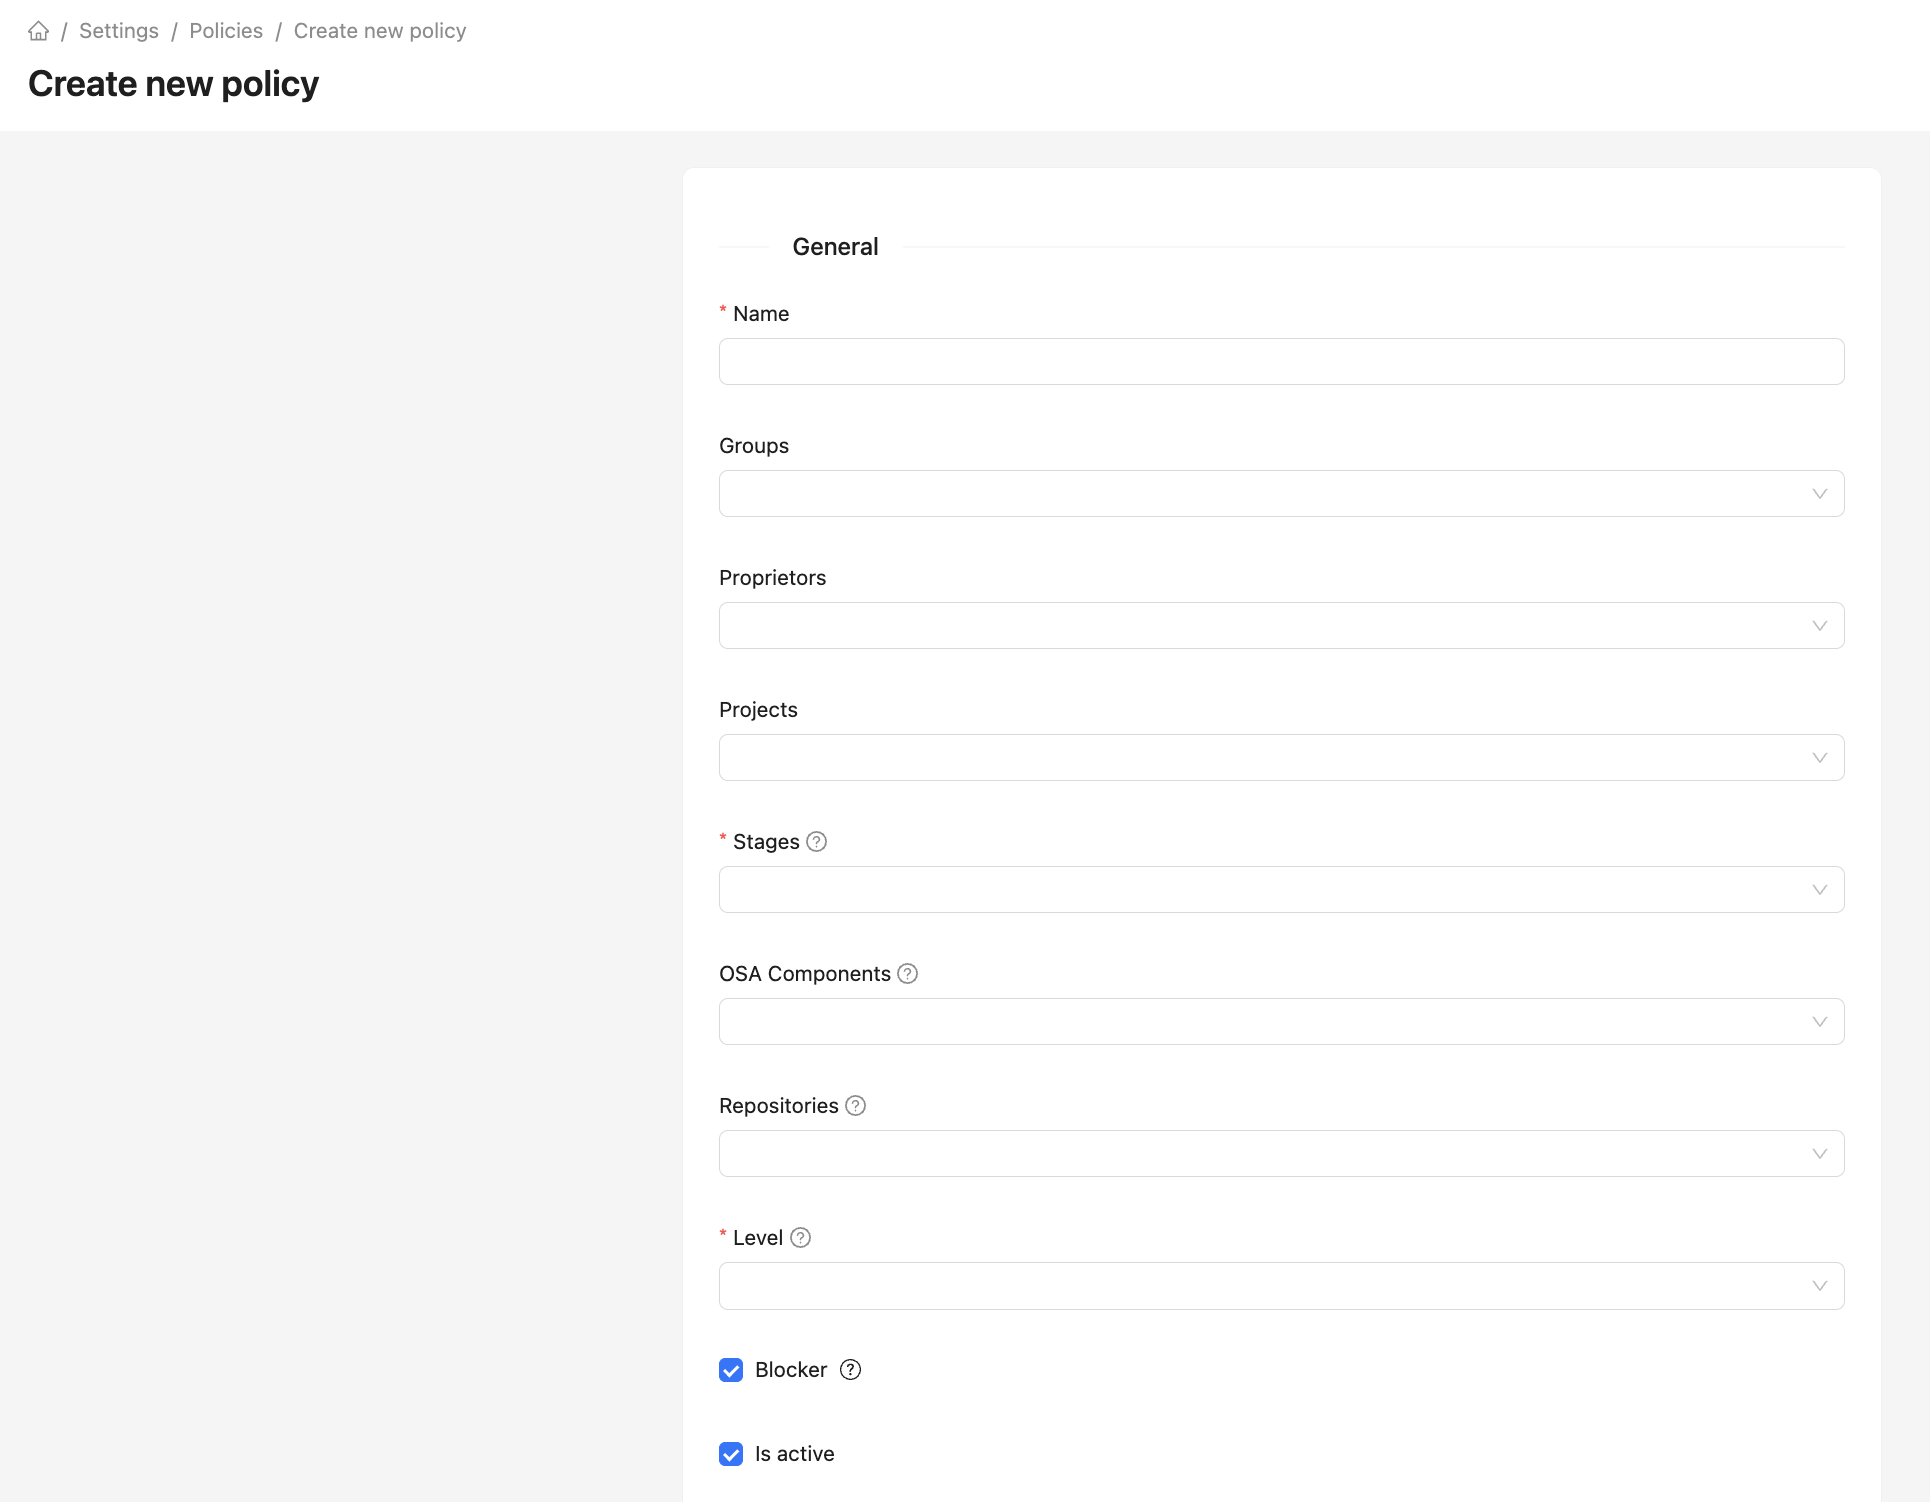
The policy creation form specifies the policy context using the following parameters:
- Name;
- Groups — user groups to which the policy applies. If the parameter is empty, the policy applies to the entire organization;
- Proprietors — organization departments to which the policy applies. If the parameter is empty, the policy applies to the entire organization;
- Projects — projects to which the policy applies;
- Stages — development cycle stages to which the policy applies;
- OSA Components — component type in the repository manager with the OSA plugin to which the policy applies (Packages or Container Images);
- Repositories — list of repositories with the OSA plugin to which the policy applies;
- Level — policy criticality level (does not affect actions in the system);
- Blocker — blocking CI build or download of a component from a proxy repository;
- Is active — policy status;
- Description — policy description;
- Conditions — list of conditions in the policy.
Next, the conditions for triggering the policy are configured; the following parameters are supported:
- PURL — package URL, component identifier;
- Dependency name;
- Dependency version;
- Dependency author
- Dependency release date;
- Dependency age (days);
- Dependency vulnerability count;
- Dependency is dangerous;
- Dependency is protestware;
- Technology — programming language or ecosystem;
- License;
- License category;
- Vulnerability ID — vulnerability identifier;
- CVSS2 Score — numerical threat score according to the CVSS 2 standard;
- CVSS2 Severity — threat level according to the CVSS 2 standard;
- CVSS2 Access Vector (AV) — vulnerability exploitation path (physical or network);
- CVSS2 Access Complexity (AC) — vulnerability exploitation complexity;
- CVSS2 Authentication (Au) — authentication requirements for vulnerability exploitation;
- CVSS2 Availability Impact (A) — degree of data availability loss;
- CVSS2 Confidentiality Impact (C) — degree of data confidentiality loss;
- CVSS2 Integrity Impact (I) — degree of data integrity loss;
- CVSS3 Score - numerical CVSS 3 threat assessment;
- CVSS3 Severity — threat level according to the CVSS 3 standard;
- CVSS3 Attack Vector (AV) — attack vector;
- CVSS3 Attack Complexity (AC) — attack complexity;
- CVSS3 Priviliges Required (PR) — required access level to exploit the vulnerability;
- CVSS3 User Interaction (UI) — presence of user interaction;
- CVSS3 Scope (S) — component security scope;
- CVSS3 Confidentiality (C) — degree of loss of data confidentiality;
- CVSS3 Integrity (I) — degree of loss of data integrity;
- CVSS3 Availability (A) — degree of loss of data availability;
- Vulnerability publication date;
- Vulnerability update date;
- Impacts (Kaspersky);
- Vulnerability has exploit;
- Vulnerability has fixed version;
- Vulnerability age (days);
- Env — development environment;
- Match type — dependency detection method (by manifest, project content, or as a result of dependency resolution);
- Relation — dependency relationship in the project (direct or transitive);
- CWE — vulnerability type identifier according to the Common Weakness Enumeration standard.
Policy example
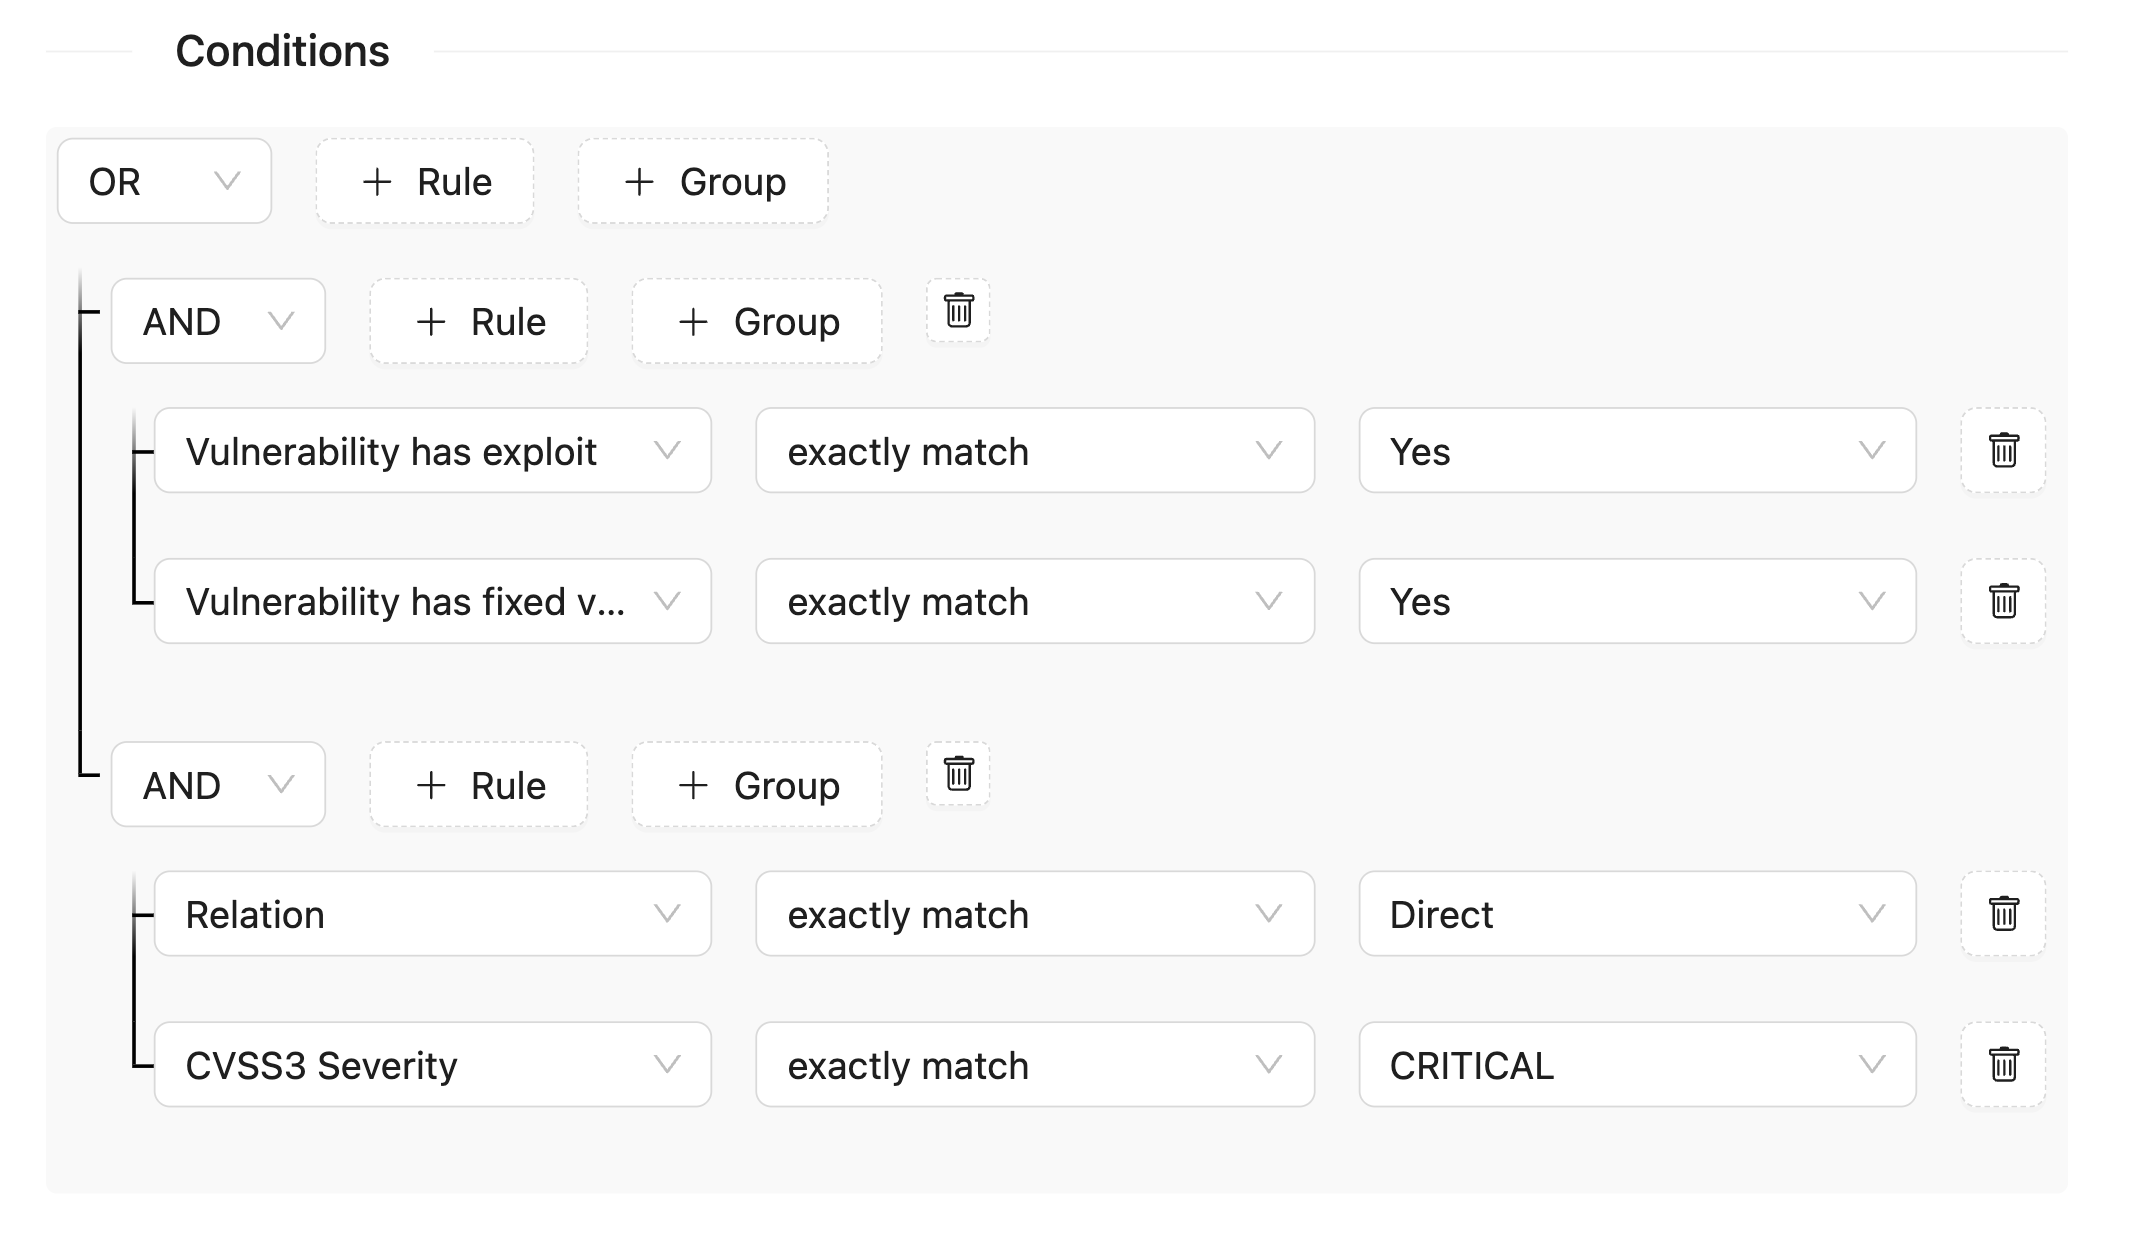
Policy conditions can be combined into groups using logical expressions AND/OR. Groups have no restrictions on the nesting level and the number of conditions.
For example, you can set policy conditions for the following scenario - either the dependency contains a vulnerability with an exploit and a fixed version, or the dependency is direct and contains a critical vulnerability according to the CVSS 3 standard.
To create such a policy, you need to add two groups united by the OR expression. This means that the policy will be triggered if any of the listed groups of conditions are met. Within the group, conditions are set, united by the AND expression.
The policy becomes active immediately after creation by clicking the Create button. For the created policy, you can configure actions when it is triggered: email notification or creation of a task in Jira.
Important: policies are triggered during analysis, so it is important to create them before running the analysis.
Recommendation: if you leave the Proprietors, Groups and Projects fields empty, the policy will apply to all active projects in the system.
Policy results
The results of the policies are displayed in the Policy alerts section. The section has three tabs:
- Active – a list of alerts based on the results of the last analysis (project, build or component in the proxy repository);
- Ignored – a list of ignored alerts;
- Resolved – a list of alerts that were resolved after the last analysis (the policy condition is no longer relevant).
The policy trigger is displayed in the Matched criteria field, including the specified conditions and the component data found. For example, the value django@4.2.2 has CVE-2024-38875, CVSS3 Score 7.5 >= 7.00 implies that the component blocking policy with CVSS3 equal to or higher than 7.00 was triggered on the django component version 4.2.2 with a vulnerability score of 7.5.
Ignoring policies
Created policies can be temporarily or permanently ignored during analysis. The ignoring condition allows you to leave the policies in the system without receiving alerts about their triggering, for example, if the vulnerability in the component is not applicable to a specific project. Ignoring conditions are created and configured in the section Settings -> Policy ignores.
To create an ignoring condition for one or more policies, click the Create button and fill in the following fields:
- Projects — projects to which the ignore is applied;
- Container images – images in registries that are ignored;
- Technology - programming language or ecosystem;
- Dependency PURl — package URL, component identifier;
- Dependency name;
- Dependency version;
- License;
- Vulnerability ID - vulnerability identifier;
- Policies;
- Is enabled - ignore state;
- Active from - date from which the ignore will start working;
- Active to - date after which the ignore will stop working;
- Note.